|
|
Expert 5K+
Posts: 9912
   
Location: Lower Mainland BC | Just curious for now. More to follow.
 |
|
| |
|
Expert 5K+
Posts: 9912
Location: Lower Mainland BC | 56D500boy - 2018-08-12 5:47 PM
Just curious for now. More to follow.
:(
Nobody replied and I was waiting to hear from Musclemania5 from whom I had order the door card set (too lazy buy hardboard and make my own).
The issue was the rear cards that I got were wrong. I couldn't figure it out. Mike at MuscleMania5 was very good to work with and assured me that it would be resolved to my satisfaction if I sent him photos which he then forwarded to his supplier, REM. REM took a day or two to figure it out: rear cars for 4 door sedans and 4 door hard tops are different. I was very surprised about this but it seems that the 4 dr hardtop had a different rear door shape than the sedan. I had no idea an further more, I don't understand why the engineers had to make the door shape different.
Apparently, somebody at REM picked 4dr hardtop rear cards instead of sedan rear cards when they filled the order. The front cards are fine and REM will be sending me the proper rear cards ASAP. In the meantime, I have made one new rear card and re-skinned it. So, other than lost time (and money), all will be good. 
Mike at MuscleMania5 was very good to work with.
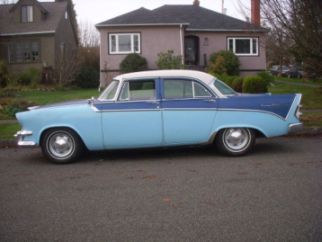
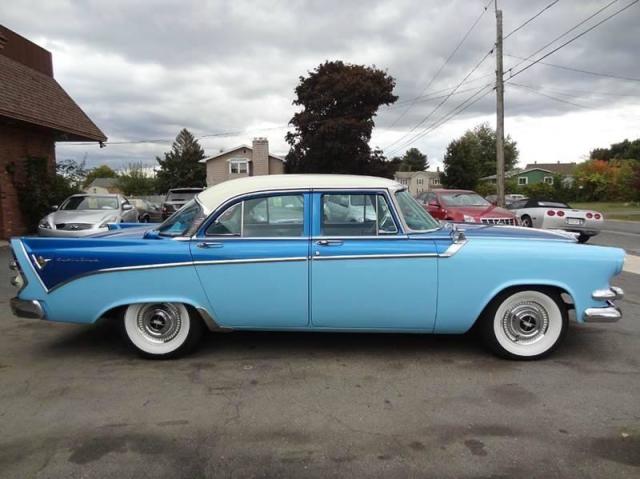
Four door hardtop:

Four door sedan, followed by the difference in door cards.
Edited by 56D500boy 2018-08-16 5:11 PM
 (20e2dceae55bc8a07cbfe4bd1c0.jpg) (20e2dceae55bc8a07cbfe4bd1c0.jpg)
 (DForgies56Dodge4drSedanRightRearDoor_REMPanelLaidOverOEPanel_Front.jpg) (DForgies56Dodge4drSedanRightRearDoor_REMPanelLaidOverOEPanel_Front.jpg)
Attachments
----------------
 20e2dceae55bc8a07cbfe4bd1c0.jpg (41KB - 303 downloads) 20e2dceae55bc8a07cbfe4bd1c0.jpg (41KB - 303 downloads)
DForgies56Dodge4drSedanRightRearDoor_REMPanelLaidOverOEPanel_Front.jpg (85KB - 292 downloads)
|
|
| |
|

Expert 5K+
Posts: 6502

Location: Newark, Texas (Fort Worth) | They told me on Ebay that they will make any 'cards' (door panels) boards if a good sample is sent in. He has a lack of 1957-1959 patterns; I believe in this era he has 4 door sedan Dodge or Plymouth.
|
|
| |
|
Elite Veteran
Posts: 977

Location: Sydney, Australia | I probably wouldn't of noticed until you pointed it out. So the hardtop has what we call a thicker "dog leg" in front of the rear wheel arch. Where as the sedan is thinner with not as much curve. Wonder if it was to add strength.
|
|
| |
|
Expert 5K+
Posts: 9912
Location: Lower Mainland BC | matte - 2018-08-18 5:28 PM
I probably wouldn't of noticed until you pointed it out. So the hardtop has what we call a thicker "dog leg" in front of the rear wheel arch. Where as the sedan is thinner with not as much curve. Wonder if it was to add strength.
Had to be a good reason. The lack of a full B-pillar obviously necessitated some mods to the structure (??). This 56 Dodge advertising video clearly shows the "dog leg" on the rear door of a four door hardtop:
https://www.youtube.com/watch?v=0rxxs9J52dw
 (56DodgeCustomRoyalRearDoorDogLeg.jpg) (56DodgeCustomRoyalRearDoorDogLeg.jpg)
Attachments
----------------
56DodgeCustomRoyalRearDoorDogLeg.jpg (96KB - 319 downloads)
|
|
| |
|

Expert 5K+
Posts: 7207
Location: Victoria, BC, on Vancouver Island, Canada | For what it's worth, the reason the four door hardtops had wider rear doors, is that both the main rear window and the rear vent with it's complicated mechanism had to both roll down and all fit within the rear door cavity. On the sedan, only the main window, not the rear vent, rolled down into the door cavity, less width needed. |
|
| |
|
Expert 5K+
Posts: 9912
Location: Lower Mainland BC | 56D500boy - 2018-08-16 5:03 PM
Apparently, somebody at REM picked 4dr hardtop rear cards instead of sedan rear cards when they filled the order. The front cards are fine and REM will be sending me the proper rear cards ASAP. In the meantime, I have made one new rear card and re-skinned it. So, other than lost time (and money ), all will be good.
Mike at MuscleMania5 was very good to work with.
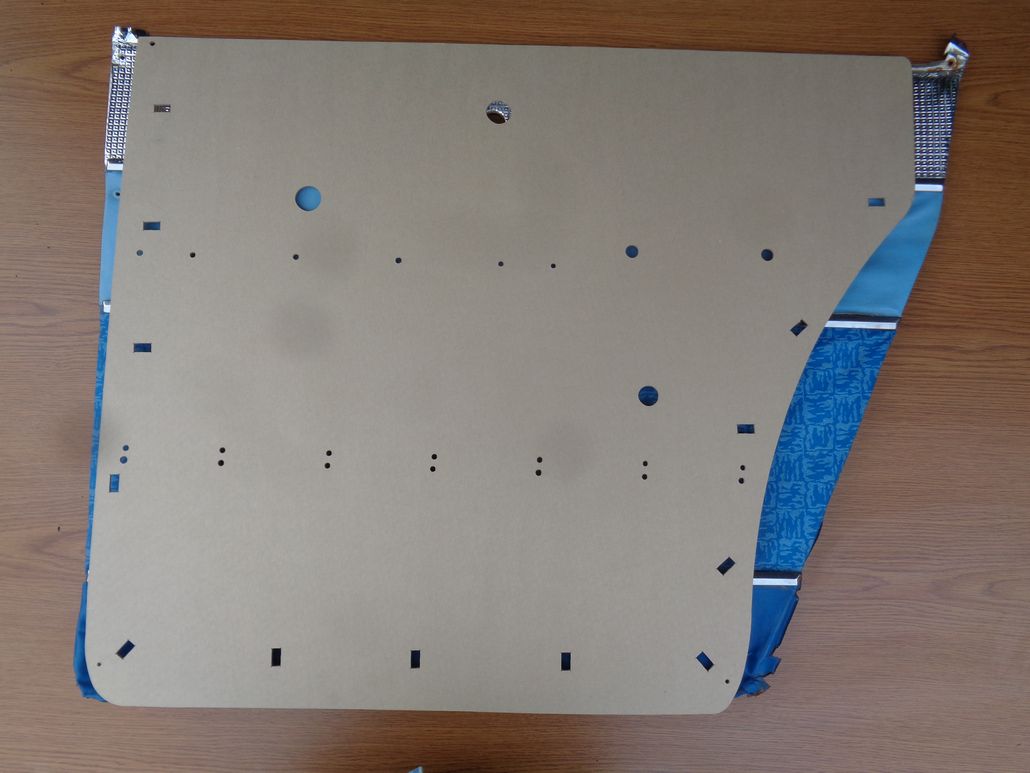
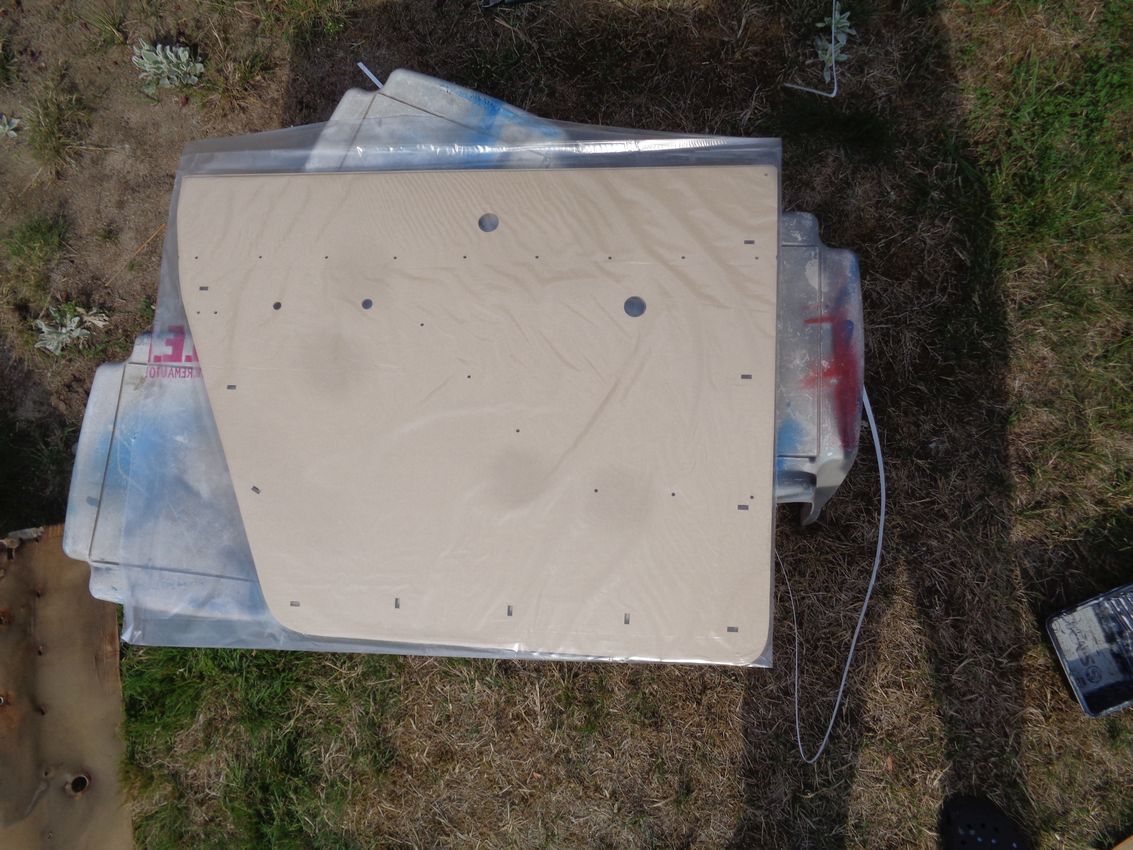
New rear door cards from REM arrived on Saturday and I picked them up today. Closer but still will need some edge trimming and hole drilling (I think they used a Coronet or Royal for their original template, not a Custom Royal). At least the replacement panels are the correct basic shape and it's easier to trim down than stretch up.
I'll see how much work they need to fit 100% when I finally get to the left rear door later this year or early next year. (Inside is going to be rusty and needs window channels, etc.)
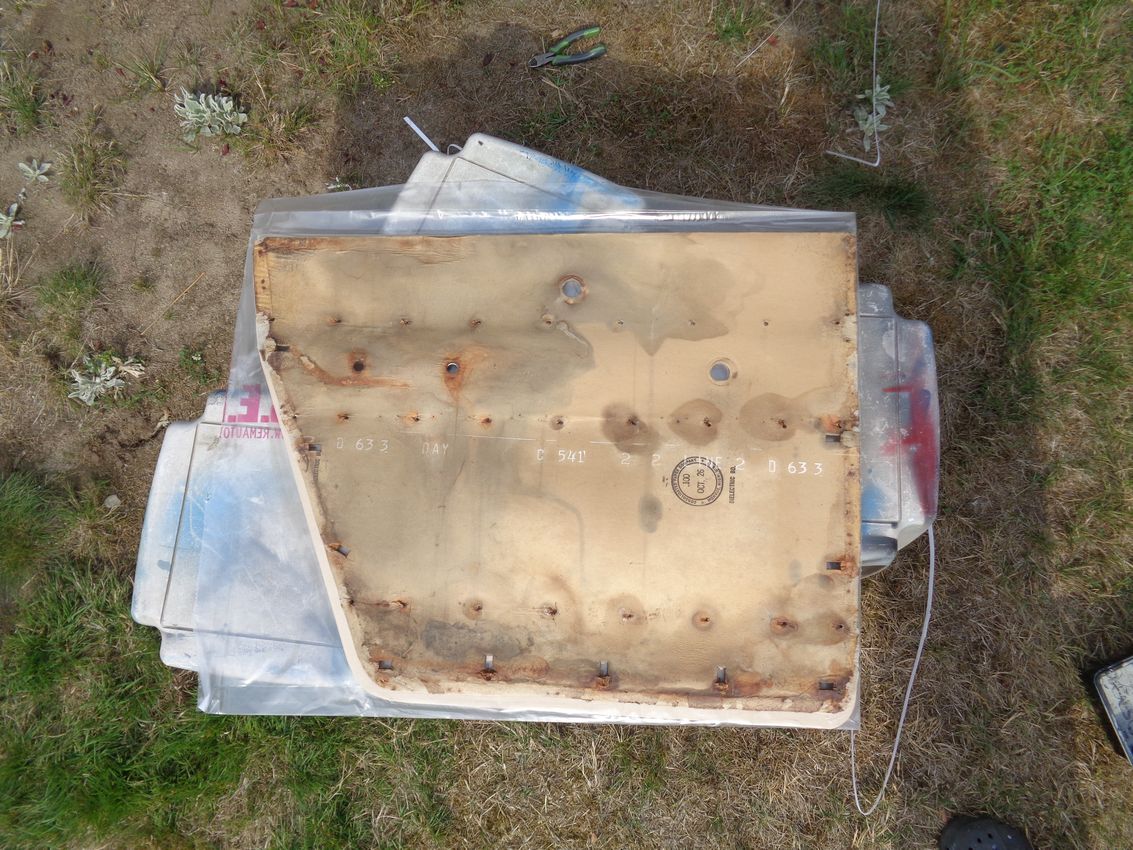
In the meantime, a shot of the replacement (proper) 4 dr sedan rear door panel and then one with the replacement panel and my old door panel. Close.
Edited by 56D500boy 2018-08-29 1:02 AM
 (ReplacementREM56Dodge4drSedanRearDoorPanel.jpg) (ReplacementREM56Dodge4drSedanRearDoorPanel.jpg)
 (ReplacementREM56Dodge4drSedanRearDoorPanel_WithOEPanelOnTop.jpg) (ReplacementREM56Dodge4drSedanRearDoorPanel_WithOEPanelOnTop.jpg)
Attachments
----------------
ReplacementREM56Dodge4drSedanRearDoorPanel.jpg (190KB - 260 downloads)
ReplacementREM56Dodge4drSedanRearDoorPanel_WithOEPanelOnTop.jpg (238KB - 292 downloads)
|
|
| |
|
Expert 5K+
Posts: 9912
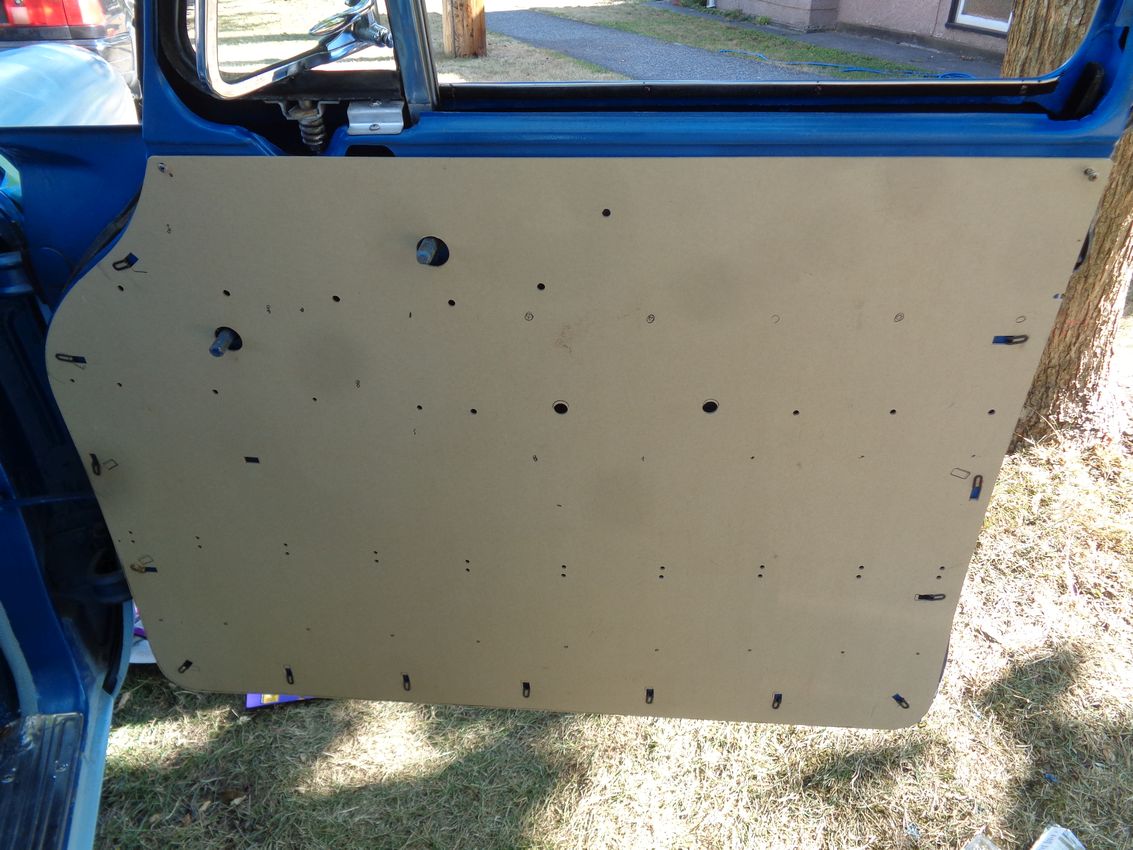
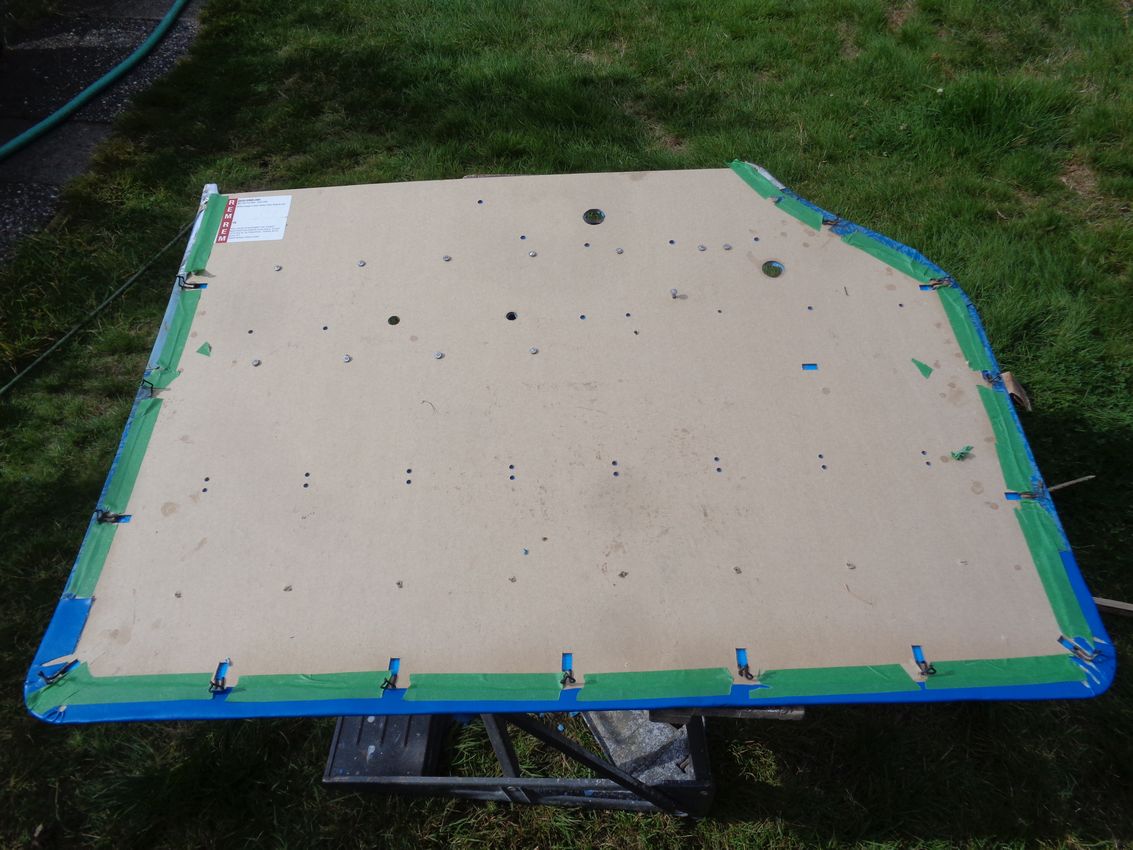
Location: Lower Mainland BC | I've moved on to the right front door and decided to try to use the REM panels that I purchased previously but never used. The front door panel is closer than I thought it would be. It is a little too wide and a little too long, both can be easily remedied in a few minutes with my jig-saw.
Using the old OE panel as a template, I marked the REM panel where the rectangular clip slots should be (mostly right on) and where the trim holes should be. The trim holes are all off - I think they must have used a Coronet or Royal to make their template. Again, no biggy per se. I few minutes with the Black and Decker and all will be good.
The best news was I was able to apply clips to the holes provided and did not have to adjust any of them to get the panel on the door. There was one that I could (and might) modify but otherwise that was good.
A photo of the REM panel on the door (prior to trimming - actually I marked where I need to trim while the panel was on the door - might need further tweeking so the door skin fits properly):
Edited by 56D500boy 2018-09-09 7:36 PM
 (REM_56Dodge4drSedanRightFrontDoorPanelOnDoor.jpg) (REM_56Dodge4drSedanRightFrontDoorPanelOnDoor.jpg)
Attachments
----------------
REM_56Dodge4drSedanRightFrontDoorPanelOnDoor.jpg (166KB - 293 downloads)
|
|
| |
|
Expert 5K+
Posts: 9912
Location: Lower Mainland BC | 56D500boy - 2018-09-09 3:12 PM
The best news was I was able to apply clips to the holes provided and did not have to adjust any of them to get the panel on the door. There was one that I could (and might) modify but otherwise that was good.
A photo of the REM panel on the door (prior to trimming - actually I marked where I need to trim while the panel was on the door - might need further tweeking so the door skin fits properly):
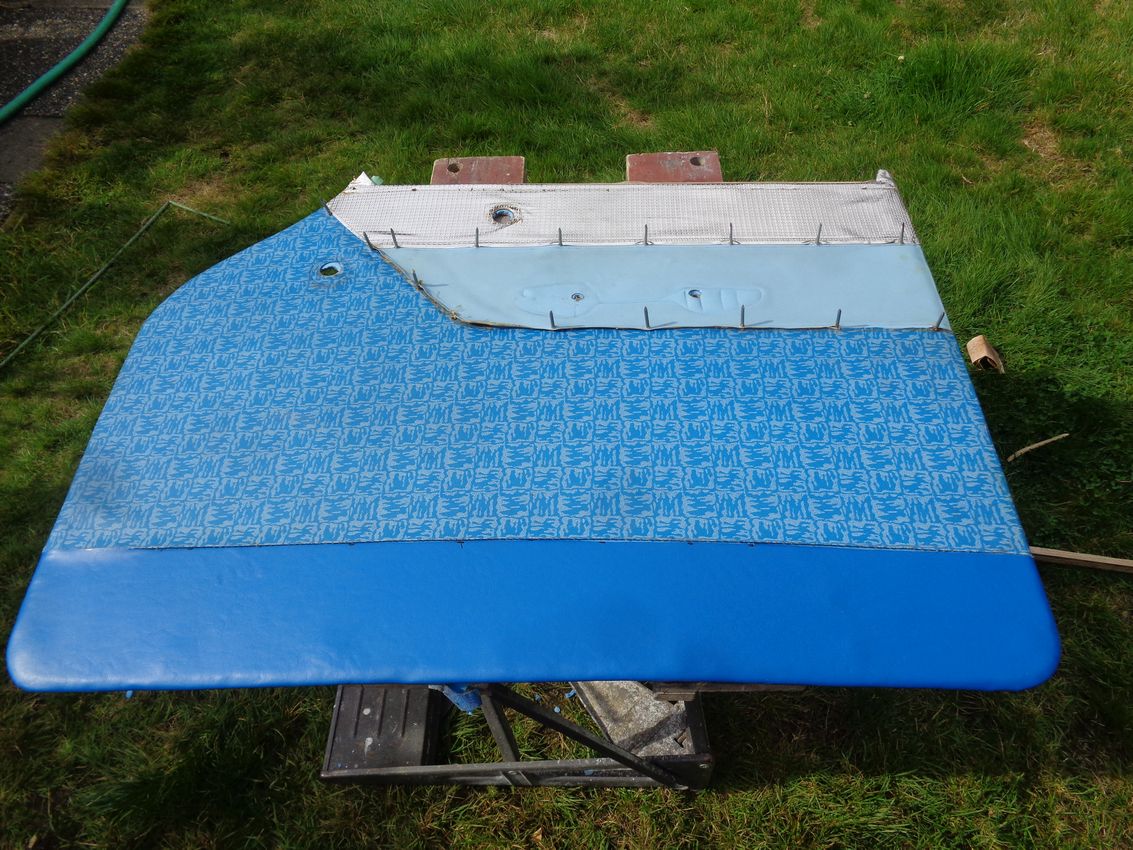
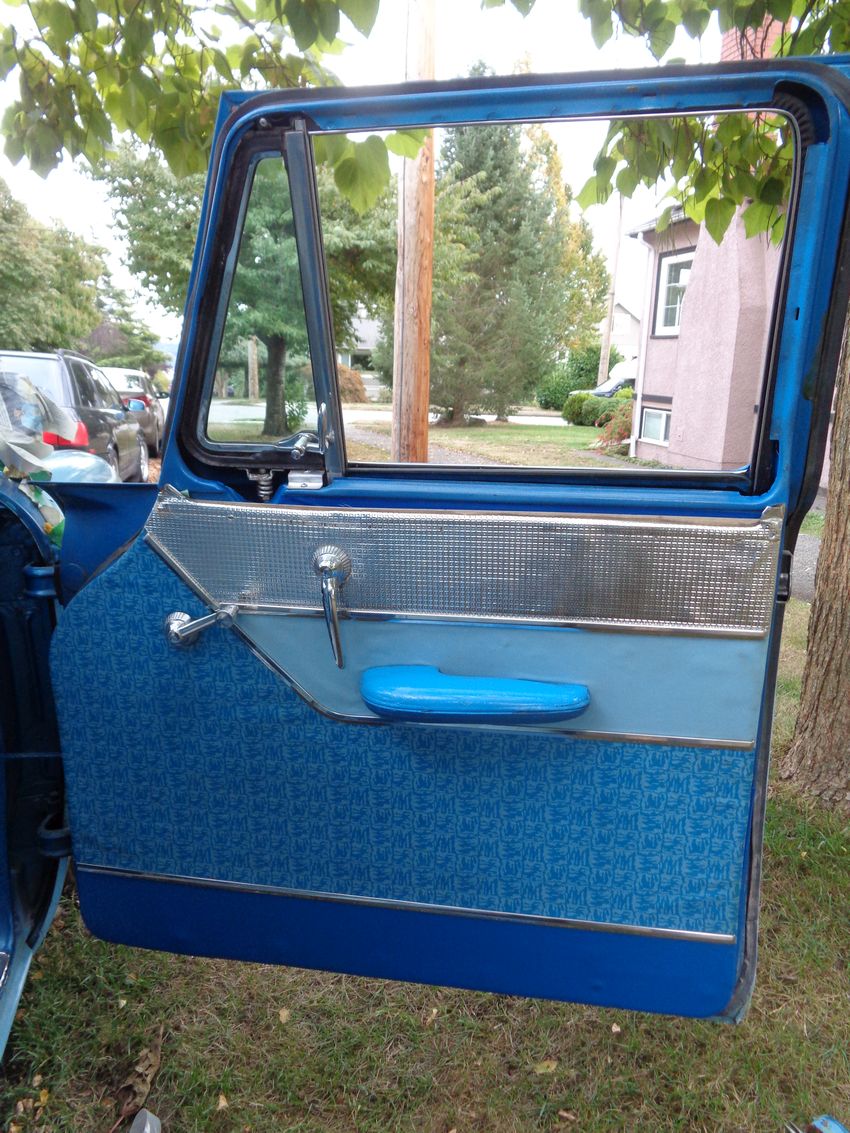
Carried on with the REM door right front door panel.
1. Trimming the REM pressed cardboard panel doesn't work with a jig saw, even with a fine metal blade. Had to trim by cutting through the panel with a sharp utility knife. Took about 1/8" off the bottom and the rear edge so the OE vinyl skin would fit better front-back and the bottom didn't over hang the metal of the door.
2. Drilled the holes for the stainless steel trim. The holes provided by REM did NOT reflect the pattern needed by the Custom Royal trim.
3. Added/readded the panel clips in the rectangular slots that REM cut. In the end, I didn't have to trim any of those holes.
4. Glued on the blue foam padding that I used on the other panels that I made.
5. Glued the mylar and upper vinyl panels to the foam. Made a small mistake at this point = sitting around, the REM Panel had bent the wrong way (buldging *AWAY* from the door) but I didn't notice. I should have bent the panel inward before I glued the skin to it. I guess the two other door cards that I made from Masonite didn't have this problem. Something to be aware of using these thinner REM panels
6. Added new vinyl to the bottom of the door. Noted that there was a taper - wider at the front, narrower at the rear.
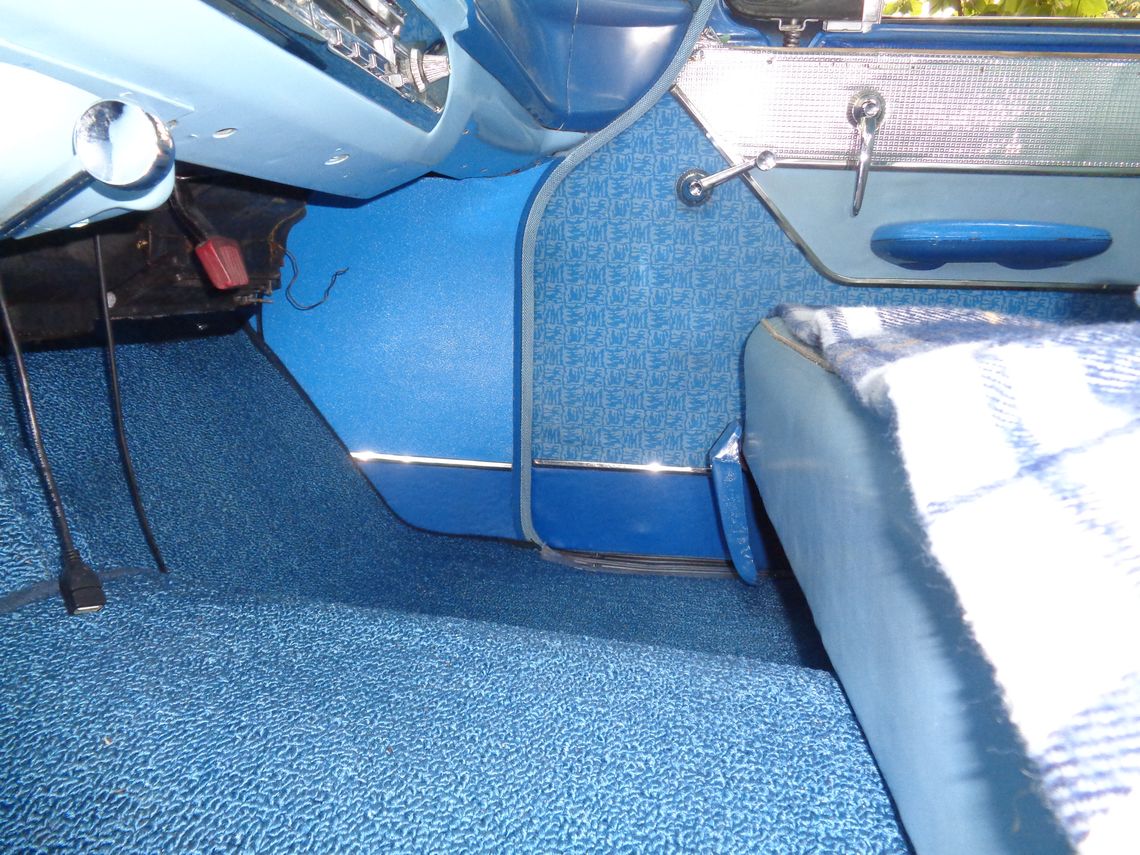
7. Redrilled the holes for the bottom(ish) trim so the exposed part of the bottom vinyl was the same front and rear. (Worked - but now my kick panel trim (that I added) needs adjustment).
8. Added all the door trim, added a vapour barrier to the door and added the completed panel to the door. Did NOT have to adjust the position of any of the clips. Used the heel of my hand to bang them home, not a rubber mallet like the other doors.
BOTTOM LINE: If you are handy, I would use the OE door panels as a template and make my own from Masonite (1/8" not thicker). If you are not handy but are prepared to do some minor trimming and drilling, the REM panels will work for you - just watch out to keep them flat or bowed (slightly) *INTO* the door.
REFERENCE: http://www.forwardlook.net/forums/forums/thread-view.asp?tid=69434&...
Photos:
 (ReskinningTheREMPanelUsingTheNailTrickAndNewVinylOnTheBottom_Front.jpg) (ReskinningTheREMPanelUsingTheNailTrickAndNewVinylOnTheBottom_Front.jpg)
 (ReskinningTheREMPanelUsingTheNailTrickAndNewVinylOnTheBottom_Back.jpg) (ReskinningTheREMPanelUsingTheNailTrickAndNewVinylOnTheBottom_Back.jpg)
 (ReskinningTheREMPanelUsingTheNailTrickAndNewVinylOnTheBottom_OnTheDoor.jpg) (ReskinningTheREMPanelUsingTheNailTrickAndNewVinylOnTheBottom_OnTheDoor.jpg)
 (ReskinningTheREMPanelUsingTheNailTrickAndNewVinylOnTheBottom_OnTheDoor_ComparedToKickPanel.jpg) (ReskinningTheREMPanelUsingTheNailTrickAndNewVinylOnTheBottom_OnTheDoor_ComparedToKickPanel.jpg)
Attachments
----------------
ReskinningTheREMPanelUsingTheNailTrickAndNewVinylOnTheBottom_Front.jpg (231KB - 274 downloads)
ReskinningTheREMPanelUsingTheNailTrickAndNewVinylOnTheBottom_Back.jpg (153KB - 269 downloads)
ReskinningTheREMPanelUsingTheNailTrickAndNewVinylOnTheBottom_OnTheDoor.jpg (230KB - 274 downloads)
ReskinningTheREMPanelUsingTheNailTrickAndNewVinylOnTheBottom_OnTheDoor_ComparedToKickPanel.jpg (235KB - 268 downloads)
|
|
| |